Sean M Puckett

Portrait and fine-art photographer. Radical programmer. Culture activist. Passionate & opinionated, yet kindly. Mind the froth.

  • Followed
  • Follows you

Edit biography

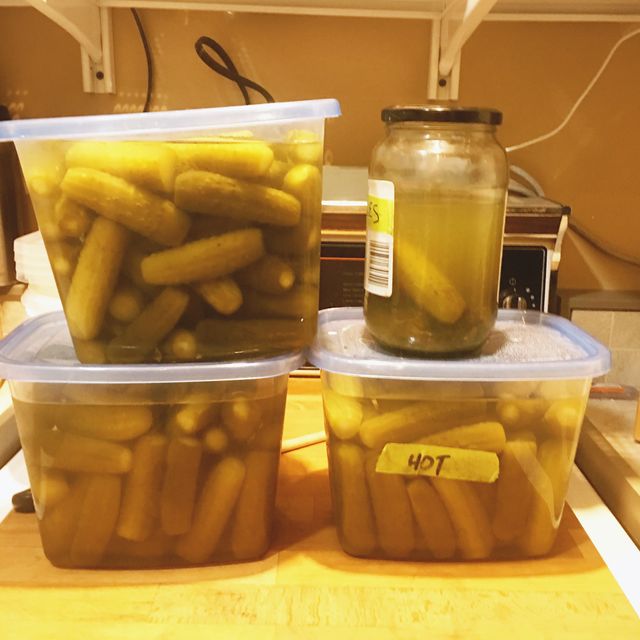
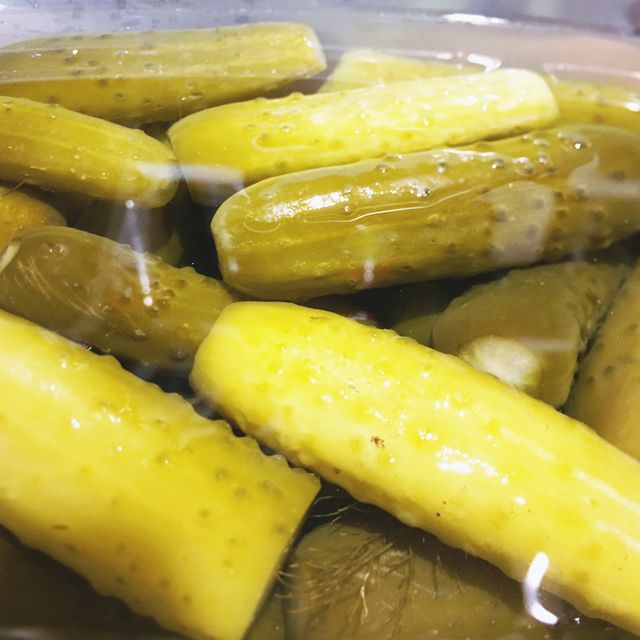
Decided to repack the four remaining bins (reminding we ate two and lost one) to put in the fridge and stop fermentation. Just seemed wise after two months. Threw one of them out as after rinsing they were a little slimy and very mushy. The other three were fine. I put them in fresh bins submerged with a bit of salt, a splash of vinegar and a trace of sodium metabisulfite. And into the fridge. 

I tasted them all, very nice. The batch with the split chile pepper was excellent, just a step above. Not obviously hot, but leaving a few tingles on the tongue. 

I doubt they’ll last out the year until next pickle season. But I also doubt we have a place to ferment and store a whole bushel next time. Half a bushel is kind of pushing it. 

By any measure, it was a successful experiment. I brought some to a party last night and those that tasted them were keenly delighted. It was cheaper to make them than buy finished pickles, even with the losses. The only downside is storage. 

So that’s where we leave the pickle story.
MORE
11/4 '18 1 Comment
I bought myself a jar of pickles in anticipation of your unveiling. :) I plan to kill it shortly. Glad you had a successful venture. Yay!
 

By request!

Dry Ingredients

  • 1/2 C sorghum flour
  • 1/2 C brown rice flour
  • 1 Tbs tapioca starch
  • 1/2 C cocoa (be generous)
  • 1/4 tsp salt
  • 1/4 tsp baking powder
  • Optional mixins up to 1/4 cup: choc chips, nuts, etc

Wet Ingredients

  • 5 Tbs butter, melted (86 grams)
  • 1 & 1/4 C granulated sugar
  • 2 eggs
  • 1 tsp vanilla
  • 1 tsp cold espresso (or 1 tsp instant coffee in 1 tsp water)

Instructions 

  1. Preheat oven to 350F; lightly grease a 9" baking pan
  2. Mix dry ingredients in one bowl
  3. Mix wet ingredients in another bowl
  4. Fold wet ingredients into dry, only until combined
  5. Turn into baking pan
  6. Bake 25-35 min, until toothpick in the center comes out clean
  7. Cool on rack under a cloth, don't cut until room temp.
  8. Keep covered in the fridge, if any survive the day.

Notes

The vanilla and coffee flavours make these extra yummy. Also mad wack chocolatey. They don't need frosting, but you could drizzle a little melted chocolate (melt 1/4 C chips in microwave, e.g.) on top once they're cut up. I've been using a 9" round springform pan; you get less of that yummy brownie "edge" but it's easier to cut them up when you can take the sides off.

NB recipe was modified by my partner from an Alice Medrich non-GF original. 

MORE
10/15 '18 8 Comments

This comment has been deleted.

You're welcome. One thing I really like about this recipe is that it is comparatively inexpensive. Rice flour and tapioca starch are cheap and while sorghum is a few bucks a pound there's just a half cup per batch. The rest is just staples. (Also, no bean flour, unlike some of those GF substitute flours, so no outrageous farts. omg.)

I hope you (and he) enjoy them!
Oh, that's funny! I actually LIKE the bean flours (in moderation).

This comment has been deleted.

"Beans beans, they're good for your heart..."

(I am 12.)
We had a local brand that put out a canned mix of beans called 12 Bean Symphony, subtitled, "eat and music will come." It had cartoon beans on the label, playing big band instruments. Lots of brass.
You and your mixins. You and your topping.

Any recipe with all rice flour, especially brown rice flour, is too gritty. Sorghum adds loft and a touch of sweetness.
There's no point in using a tasty starch like arrowroot in these, though arrowroot starch is excellent in more delicately flavoured baked goods to provide the structure GF non-mix flours don't have. I have always tried to avoid guar and xanthan gums (common in commercial baked GF food and some GF flour mixes) in baking due to their weird texture effects.
This looks yummy. I wonder if it'll work with the Earth balance baking margarine.

Re: beans, ymmv, but black beans are notably low in FODMAPs as beans go. Which could make them a better bet than others for those who are fluent in flatulent.
 

Went to one library this morning to pick up some holds. A couple SQUIRREL GIRL stand-alones, plus also SOFT X-RAY MINDHUNTERS which was recommended.

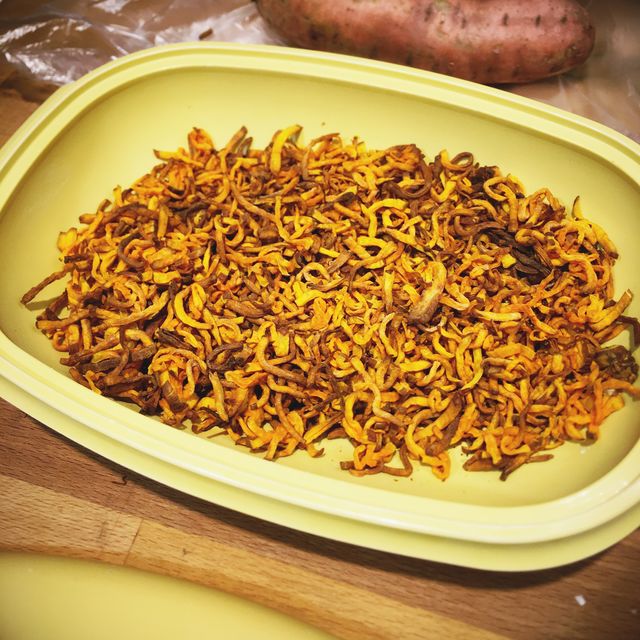
Then made my third batch of gf fudge brownies in the past seven days. In our defence they keep getting brought to parties and people other than us eat them. This batch is all ours. Also made sweet potato sticks with a bit of heat.

And now the errands are piling up again. I have four stops to make. I guess it's not terrible that I can just walk to all of them.

A different library (the big reference one) to return OTHERWORLD BARBARA which was just a bit too-too for me), dollar store for a few snack items, bulk food store for a few staple baking goods and peanuts, grocery store for eggs.

d is off at a choir intensive rehearsal until early evening. I've been keeping busy but at some point I'll probably just sit down and read. Or maybe go out and look at something or ???

I'm working on making more friends but still don't have anyone close enough to just hang out with kind of spontaneously. It doesn't help when half the time I feel too worthless to see the merit in anyone else hanging out with me. Not a good headspace to be in when meeting new people. But that's not this post.

Nope, this post is just -- hello autumn weather, I've been busy today, I made some food, I ate some food, I pet some cats, now I'm going out.

Hope y'all's day is doing you a solid.

-- edited to add -- 

Sweet Potato Sticks (air fryer)

These are dead simple if-and-only-if you have an "air fryer" device. Otherwise I probably would not bother trying to make them with manual stir-fry methods. Anyway.

  1. Julienne 2lb of rinsed but unpeeled yellow flesh sweet potatoes into 1/8" x 1/8" sticks of varying lengths.
  2. Add to air fryer along with 2T oil (we use bacon grease, anything is fine).
  3. Season with about 2t of salt or to taste.
  4. Add additional spices to taste. I've used Montreal steak seasoning, chili powder / hot sauce, whatever I feel like. I bet dill powder would be great.
  5. Run your air fryer for 40-45 minutes or until some of the sticks are starting to get a little blackened. Stir occasionally if the automatic agitator kind of sucks like ours does.
  6. Turn out onto a cookie sheet to cool; they'll become quite crisp.
  7. Try not to eat them all immediately.
MORE
10/13 '18 7 Comments
I wish we could do a OPW IRL hangout. That wouldn't solve the spontaneous-hangout-pal problem, but it would be cool nonetheless. (But that may cause yet another batch of GF fudge brownies to be eaten by someone other than you two... bwa-ha-ha)
Yeah, it would be pretty great to see y'all occasionally or on the regular.
If people want to make that happen, I will ALWAYS volunteer to host. I LIKE having folks in the house; gives the place a warm happy feeling.
I wouldn't be sad if you shared your recipe for sweet potato sticks...
I added the recipe to the post!
You are the second resource in my life that has recommended air fryers.
Well, I will tell what we have used ours for: bacon (two packages at a time, cut in half), chicken parts (wings, drums, thighs), potato sticks. It’s good for smaller items of consistent size. Riblets or stir fry or etc. Its easy enough to clean. Not as widely useful as Instant Pot though.
 

I'd just like to give you an update on the pickles. Since we ran out of commercial pickles a couple weeks ago, I've been harvesting them out of our fermentation bins and putting them in the same jar, reusing the pickle juice that's in it. And, eventually, topping up the juice with our own.

The pickles are good. Not the best; I want a bit more garlic, a bit more dill, a bit more tang. And probably fewer additional spices. The flavour is complex, which is nice, but I think generally you want a pickle that's less of an orchestra hit (THWAMP) and more of a simpler but more harmonic electric guitar chord (BWARRRMM). So the pickle can join in with other flavours rather than just try to own the plate. 

Maybe there's a distinction to be made between solo pickles that you eat on their own, and harmonic pickles that you eat with other food. Am I over thinking this? No, these are pickles we're talking about. You can't overthink pickles. You can, however, overeat them. I assume. I won't test this hypothesis. Take it as read. 

Any way, the process seems solid. Next year, when number 2 cukes come around again, I'll try a difference recipe. I'll let you know if any of the bins fail; I'll be doing an edibility test on each new bin as we break into it just to be sure. 

MORE
10/11 '18 8 Comments
Kimchee is a kind of pickle. It owns the plate, the dish, and the next few hours.
They bury it to protect the innocent
Yep, Kimchee definitely lets ya know who's temporarily taken over as the boss of your mouf and innards. (Nom nom!)
I definitely prefer BWAAARRRRMMMM to THWAMP.
I was, literally, JUST thinking to myself, "We haven't had a pickle update in a while..."

When you say you want a bit more tang, do you mean greater sourness? Or something else? I'm wondering if they'll get tangier the longer they sit...

Also I love your musical analogy.
Yeah, I do want more sour. A more aggro pickle, one that bites back. The fermenting guide says the amount of salt in the brine controls sourness, up to a point. I went with the "half sour" salt:water ratio because I wasn't sure what that meant in terms of taste. Next time, I'll do full sour.

.... though I'm considering adding salt to one of the bins to see if I can kick it up now. I wonder if that's how that works.

Hmmmm... sounds like SCIENCE.
Ooo. I wonder if adding more salt (or using more salt the next time) would also help keep any batches from going bad? I mean, doesn't the brine itself help keep unwelcome bacteria/yeast beasties from colonizing?
THWAMMP and BWARRRMM. I freakin' love this. Your brain is most excellent.
 

OK if you take the soft white corn tortillas (which are very thin and fragile) and spread a tbsp of pasta sauce on them then put them in the toaster oven for a "toast" cycle and let them rest a bit, the sauce will cook down enough so that you can then put cheese and meat on top for a second toast cycle and they won't fall apart when you eat them. Maybe even have a bit of browning on the bottom for a lovely crusty crunch.

And it's not terrible, even tastes pretty good, for a GF pizza-like food product.

It's taken like a half dozen disintegrating, bad tasting, why am I eating this garbage variations to arrive at this bit of culinary wisdom over the past few weeks.

So if this is a road you'd like to travel, I've put down some gravel, at least, so you don't get your wheels stuck in the soggy tortilla mire.

MORE
9/25 '18 3 Comments
Thank you. I might have to try this.
Sounds interesting! And simple.

I keep wanting to try a cauliflower crust, as people who have rave about it. But then I look a the recipes and think it looks like too much work.
 

I was just reviewing my OPW posts and saw I'd put up a floorplan of the previous apartment, but I haven't posted our condo's floor plan. So here it is.


A bit sloppy as the original was flipped but I've updated it with the moved closet in the master BR (it used to be a wart in the smaller bedroom, rude). The kitchen bar/passthrough is wider and has no uppers now, and there's a laundry machine in the adjacent storage room.

It's an interesting building and I think it's very smartly designed. There are two 20 storey circular towers, each floor with nine suites. (There is no "13" floor, and the top floor that would be 21 is labeled "PH" though the suites there are identical to those below.) That angle between the two walls is indeed 40 degrees and it's kind of a pain dealing with it. On the other hand, it makes for much less wasted space in the common elevator area. All of our doors open very near each other in the centre of the tower, a small hallway that runs around the elevators / stairwell / mechanical ducts in the centre of the building. Most of the units are nearly identical in layout and size, though there's +/- 10% square footage to accommodate structural elements. There's a low building between the towers that has six floors of units with rectangular layouts. On the ground floor and three floors below that are parking, lockers, and extensive amenities (gym, sauna, pool, library, movie room, hobby/woodworking room, etc). And there's a nice garden too.

All told there are nearly 400 units. I figure this, combined with the smart design, is how our condo fees are so low given what we're getting for them. One might think the $250K per month the condo corp receives in fees is a lot, but it's not cheap to run and maintain a big building, and do it well. Plus pay city taxes.

We like it here, and the only annoying thing right now is the shortage of personal storage lockers (e.g. rental closets) that are presently oversubscribed, so we still have a few boxes / bins of art materials and tools that should ideally be stored away out of sight but there's nowhere to put them but in our living space.

Also it's easy walking distance to p much everything.

MORE
9/22 '18 8 Comments
Wow! What a nice layout! But you didn't diagram in where the pickle buckets are...
Heh. Right now they're in a spill-proof container on a small furniture dolly in the laundry area. I should post an update ... tomorrow.
There are surprisingly more right-angles in this floorplan than I would have expected on first glance.

This looks and sounds like a wonderful place to live. Congrats again on the move and finding a place you both love and can feel comfy and welcome, and where you can get what you want closeby.
Yeah, they really did a good job with minimizing wierd corners. That said it was still a pain in the ass doing the baseboards.
We also pay city taxes. Not the sum someone with their own yard to maintain would, but enough to cover services.
This V-shaped floor-plan clearly demonstrates that Sean, and not Richard Herd, was actually the leader of the Visitors.
I have a cookbook for sale, too.
 

The remaining six batches continue to smell okay on their half-week check-up. I have reasonable confidence they won't go bad.

We ran out of store-bought pickles. I picked a tub and filled up the jar, keeping the brine that was in it. We can at least have some kinda pickle experience while the rest mature. They're not really really done yet. 

Tasted one. Kinda... garlicky... [ coughs ] .. yeah... going to be a good pickle when it grows up. I wonder if there's enough dill, though. Maybe I should get some dill seed and toss it in, just to be sure. Couldn't hurt, right?

Edited to add

Good news: I did buy some more dill and added it to all of the batches. It just felt like the right thing to do.

Bad news: I think one of them is going bad. It doesn't smell quite right when I opened it all the way up, and there's a bit of an oil-slick appearance to the surface of the liquid. I'll look at it again on Saturday to verify but we are probably down to five. Fortunately, the hot pepper amended batch is still fine.

MORE
9/19 '18 4 Comments
I too am pro pickle.
Please mail me a pickle when done. Kthxbai.
I am also a fan of the pickle updates. Come on little greenies, you can make it!
I love pickle updates.
 

I am saddened to report the loss of 1 of our 7 tubs of fermenting pickles to -- probably -- moldy garlic, as the cloves were shot through blue. I check them every day to see how they're doing and this tub smelled awful.

​​​​​​​Hoping the other garlic wasn't contaminated, but a little concerned as they look a little bluish. All we can do is watch.

I tasted a pickle from a tub that smelled okay and it has a good flavour and a decent crispness. It's young. It has promise. These will be good pickles if they survive.

MORE
9/15 '18 5 Comments
Blue garlic means moldy garlic?
Crap. I'll tell my neighbor across the street. She makes fire cider, and she said her garlic turned blue, too.
Well, it turned blue during fermentation. Next time I will absolutely make sure the garlic was freshly harvested rather than sitting around for n months.
I admit I never heard of fermented pickles. I always assumed pickles were made by putting smallish cukes in vinegary salty spiced liquid for n months and eventually you ate 'em. I never even considered that fermenting was part of it.

But thanks to you (and I mean thank you sincerely) I went down a pickling rabbit hole and enjoyed learning about the various ways to make something I really like eating.

I hope your other batches survive!
I'm kinda tempted to get some cukes and throw em in a jar with stuff.
I endorse this activity!
 

We bought half a bushel of pickling cucumbers Saturday. I was determined to make fermented a.k.a. barrel pickles. Since we don't have a canner any more. I read up on the theory behind the process, studied recipes and synthesised my own. I've got seven small tubs with about 3l of pickles in each.

At this point, all seven pickle tubs seem to be full of happy bacteria turning cucumber carbohydrates into gas and hopefully lactic acid, which is the whole idea behind fermented (barrel) pickles.

The tubs I got have snap lids and they are too air tight and the foam was rising up and seeping out the edges and pouring liquid on the floor. That sucked. I drilled holes in the tops, that should stop the pressure build up.

One should skim the foam off the liquid each day, and yes there's a bit of white foamy stuff as the air bubbles up through the water which is very alive with bacteria.

If I wasn't afraid of a batch going bad, i'd just dump all the tubs out into a kitchen garbage can because it would be SO MUCH EASIER to deal with one big, non-spilling container rather than seven small ones. But, first time, etc and all that. We must see this through for science.

Recipe I concocted:

For each 3.3l capacity tub:

  • 5-7 cloves of garlic, halved crosswise
  • 3-4 fat dill flower heads
  • 3-5 star aniseed pods
  • 1/2 tsp mustard seeds
  • 6-10 black peppercorns
  • 2-3 bay leaves for crispness
  • enough #2 cukes to come close to the top, both ends cropped
  • brine to cover (2tbsp salt per quart of water)

Put a weight on the pickles so they don't break the surface of the water. Cover the tubs to keep out dust and critters, but not an airtight seal as the fermentation produces gas.  

Supposedly they'll be half-sour in a week and full sour in several weeks, and fermentation will slow down/stop at some point so they don't need to be refrigerated if one is willing to have very sour pickles. I hope so. Our fridge isn't very big.

---

This isn't much of an update about moving and stuff. But it's what I wanted to write about.

MORE
9/10 '18 6 Comments
Hmmm. Although the ones I have are labeled dill pickles, there's barely any dill in the jar. Ingredients read: sea salt, garlic, black pepper, allspice, coriander, yellow mustard, celery seed, fennel seed... with dill listed last.
The fennel is interesting, that would have been a nice compliment. I kind of forgot to add a couple cloves to each tub, but given that I don't think we have any, I'm not too worried about it. Next time!
I think pickle seasoning should always be a dice roll. There are too many interesting flavor combinations to stick to just one recipe.

I did like the fennel note. The celery seed I could take or leave.
Pickles! I love fermented pickles! I just went and got one out of my fridge after reading this. I did not ferment it myself, because I am not so very BOSS as you, and fermented veggies are easy to come by in farm country, but still. Thanks for reminding me to eat one!

Some people have those fancy dedicated mini wine fridges in their kitchens. Clearly you need a dedicated mini pickle fridge.
I have my eye on this beautiful two door fridge-on-top from IKEA with a pull out freezer compartment; I swear it would hold twice as much as the unit that came with the flat, or at least it would be twice as easy to reach things. But we gotta save our pennies first.
Yeah, fridge configurations can be tricky. You can't just compare cubic feet to cubic feet, because everyone uses the space differently. So the Ikea one you're eyeballing might very well double the kind of storage space you need most, regardless of the measurements.

My solution for the past ... 13 years maybe? has been to have two separate units. One wholly a fridge and one a dedicated freezer. Where we've lived, those matched units end up costing about the same as one of the fancier all-in-ones with the french doors on top/freezer drawer on bottom and gave me a little more fridge space and a lot more freezer space. Since I freeze a lot of stuff, that's my ideal config. But you do have to have to space in your domicile for it. In our first house, the fridge unit went in the kitchen, and the freezer went a few steps away in the garage (which worked great; I don't go into the freezer nearly as often as the fridge). In this house, the freezer sat in the dining room until we renovated the kitchen to give it a home there. (Can't put a freezer in the garage in this climate; too cold; worked fine in CA, though.)
 

Closed on the house. Picked up the keys. Sorted old junk mail. Explored the maze-like basement levels. Opened windows. Laid on the floor. Listened to birds. It's ours.

Tomorrow will be photographing "before", a whole lot of measuring, and some exploratory demolition.


MORE
6/5 '18 4 Comments
It is a beautiful moment.
Yaaaaay!! Congratulations!
Congrats man. I had an experience at least somewhat similar a number of years ago, and it was a damn fine feeling. :)
Ooo. I love the feel of those first moments, suddenly shifting from imagining the space being yours to imagining what you will do in/with the space that is now yours. Congratulations!